Unlock Your Garden's Potential with Onion Sets
Few things are as satisfying as harvesting your own bountiful crop of homegrown onions. Crisp, flavorful, and versatile, they form the backbone of countless culinary creations. While growing onions from seed is an option, many gardeners, from beginners to seasoned veterans, swear by onion sets. These small, immature onion bulbs offer a significant head start, promising an easier path to a robust harvest.
But what exactly are onion sets? Simply put, they are young onion bulbs grown for a single season, harvested prematurely, and then dried. When you plant them, they essentially pick up where they left off, dedicating their energy to developing a full-sized bulb rather than germinating from scratch. This translates to faster growth, earlier harvests, and often, larger, more consistent bulbs compared to starting from tiny seeds. They're also more forgiving and less prone to certain diseases or bolting (premature flowering), especially when planted for overwintering.
If you're wondering how to plant onion sets to achieve that enviable bumper harvest, you're in the right place. This comprehensive guide will walk you through every essential step, from choosing the perfect sets to enjoying your homegrown bounty.
Choosing the Best Onion Sets for Success
The foundation of a great onion harvest begins long before you break ground: it starts with selecting the right onion sets. This crucial step impacts everything from flavor to yield and even your success in different climates.
Understand Onion Varieties
Onions come in a delightful array of types, each with unique characteristics:
- Yellow Onions: The undisputed workhorse of the kitchen. These are generally robust, with a pungent flavor that mellows and sweetens significantly when cooked. Their high sugar content makes them excellent for caramelizing.
- White Onions: Milder and often crisper than yellow varieties, white onions are fantastic for fresh applications like salads, sandwiches, and salsas where a less intense onion flavor is desired.
- Red Onions: Known for their beautiful purple-red skins and often sweeter, milder flavor profile. Red onions are a staple in raw dishes, salads, and grilled preparations where their vibrant color and gentle bite shine.
Size Matters (But Not Always Bigger!)
It might seem intuitive that larger onion sets would produce larger onions, and to some extent, that's true. However, there's a catch. Oversized onion sets (larger than a marble) are more susceptible to bolting. Bolting occurs when the onion plant prematurely sends up a flower stalk and goes to seed instead of focusing its energy on bulb development. This results in a much smaller, often woody, and unappetizing onion. For the most reliable and substantial harvest, aim for medium-sized sets – typically about the diameter of a dime to a nickel. These offer the best balance between vigorous growth and reduced bolting risk. For more insights on maximizing your onion size, check out our guide on Grow Big Onions: Essential Tips for Planting Quality Sets.
Day-Length Specifics: Know Your Climate
Onions are incredibly sensitive to day length, which dictates when they begin to form bulbs. Choosing the wrong type for your region can lead to a sparse or non-existent harvest:
- Long-Day Onions: These varieties require 14-16 hours of daylight to trigger bulb formation. They are best suited for northern climates (typically above 35-38 degrees latitude) with long summer days.
- Short-Day Onions: Ideal for southern climates (typically below 35-38 degrees latitude), these onions need only 10-12 hours of daylight to begin bulbing.
- Intermediate-Day Onions (Day-Neutral): A versatile option that bulks up with 12-14 hours of daylight, making them suitable for a broader range of mid-latitude regions.
Always check the packaging or consult your local extension office to determine the best day-length type for your specific growing zone.
Site Selection and Soil Preparation: The Foundation of Growth
Once you've carefully selected your onion sets, the next critical steps involve choosing the perfect spot in your garden and getting its soil into prime condition. Onions are not particularly fussy, but they do have specific preferences that, when met, lead to significantly better yields.
The Perfect Plot: Location, Location, Location
- Full Sun is Non-Negotiable: Onions are sun-worshippers. They need a minimum of 6-8 hours of direct sunlight per day to photosynthesize effectively and develop large, healthy bulbs. Shady spots will result in small, underdeveloped onions.
- Excellent Drainage: While onions need consistent moisture, they absolutely abhor "wet feet." Waterlogged soil can quickly lead to rot and fungal diseases. Choose a site with naturally well-drained soil, or consider raised beds if your garden soil tends to be heavy clay.
- Loose and Rock-Free Soil: Onions need room to expand their bulbs without obstruction. Compacted soil or areas laden with rocks will restrict growth and result in misshapen, smaller onions.
- Crop Rotation is Key: To minimize the risk of soil-borne diseases and pest issues, avoid planting onions or other alliums (like garlic, leeks, or chives) in the same spot more than once every three years. This breaks disease cycles and allows the soil to replenish specific nutrients.
Crafting Ideal Onion Soil
Onions thrive in fertile, well-drained soil with a slightly acidic to neutral pH, ideally between 6.0 and 7.0. A soil test is highly recommended to accurately determine your starting point and any necessary amendments.
- Adjusting pH:
- If your soil is too acidic (pH below 6.0), incorporate agricultural lime according to soil test recommendations.
- If your soil is too alkaline (pH above 7.0), add elemental sulfur to lower the pH.
It's important to make these adjustments well in advance of planting, ideally several weeks to allow the soil chemistry to stabilize.
- Enriching with Organic Matter: This is arguably the most beneficial step for onion soil preparation. Work a generous 2-4 inch layer of well-rotted compost, aged manure, or other organic matter into the top 6-8 inches of your planting bed. Organic matter will:
- Improve soil structure, enhancing drainage in heavy soils and increasing water retention in sandy soils.
- Provide a slow, steady supply of essential nutrients.
- Foster a healthy microbial environment, crucial for robust plant growth.
Thoroughly mix these amendments into the soil, breaking up any clumps and ensuring a fine, crumbly texture. This deep preparation ensures your onion sets have unrestricted access to nutrients and space to grow into magnificent bulbs.
Planting Your Onion Sets: Step-by-Step for a Bumper Crop
With your site prepared and sets chosen, it's time for the gratifying act of planting. Timing is everything here. Onion sets are typically planted in early spring as soon as the soil can be worked, well before the last frost. In milder climates, some varieties can also be planted in the fall for an early spring harvest.
The Planting Process
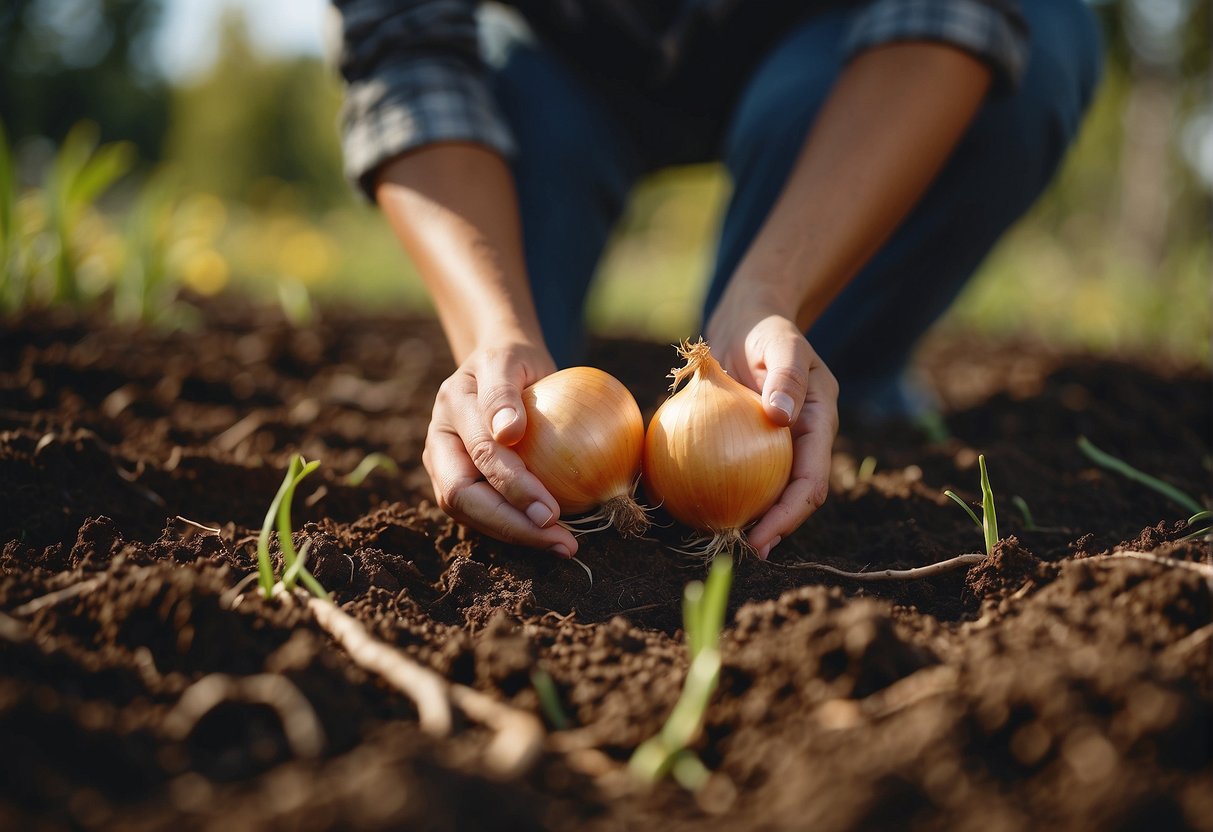
- Create Furrows or Holes: Using a trowel, a dibber, or even your finger, create shallow furrows or individual holes. The goal is to plant the sets so that their base is firmly in the soil, but the very tip is just barely visible above the surface. A planting depth of about 1 inch is usually sufficient.
- Proper Spacing: Spacing is crucial for bulb development.
- For large, mature bulbs, plant individual sets 4-6 inches apart.
- If you plan to harvest some as green onions (scallions) earlier in the season, you can plant them closer (2-3 inches apart) and then thin them out as needed, leaving the remaining plants space to bulb up.
- Orient the Set Correctly: Onion sets have a slightly flattened bottom (where roots will emerge) and a more pointed top (where the green shoot will appear). Ensure you plant them with the root end down.
- Gently Firm the Soil: Once the sets are in place, gently firm the soil around them with your hands. Avoid compacting the soil too heavily.
- Water Thoroughly: Immediately after planting, give the area a good, deep watering. This helps settle the soil around the sets and initiates root growth.
Ongoing Care for a Flourishing Harvest
Planting is just the beginning. Consistent care throughout the growing season will ensure your onion sets develop into large, healthy bulbs.
Watering
Onions need consistent moisture, especially during their active growth phase and as bulbs are forming. Aim for about an inch of water per week, either from rainfall or irrigation. Feel the soil; if the top inch or two is dry, it's time to water. As the bulbs mature and harvest approaches, you can gradually reduce watering to help them cure.
Weeding
Onions are poor competitors against weeds. Weeds steal vital nutrients, water, and sunlight, stunting onion growth. Weed regularly and carefully. Shallow cultivation or hand-pulling is best to avoid damaging the shallow onion roots. A layer of organic mulch (like straw or shredded leaves) can help suppress weeds, conserve moisture, and regulate soil temperature.
Fertilizing
If your soil was well-prepared with organic matter, additional fertilization might not be necessary. However, if your onions show signs of nutrient deficiency (e.g., yellowing leaves), a balanced, all-purpose granular fertilizer or a nitrogen-rich feed can be applied early in the season to promote foliage growth. Avoid high-nitrogen fertilizers once bulbing begins, as this can encourage leafy growth at the expense of bulb development.
Pest and Disease Management
Onions are generally robust, but keep an eye out for common pests like thrips or onion maggots, and diseases such as downy mildew. Good air circulation, proper spacing, crop rotation, and keeping your garden clean are your best defenses. Addressing issues early can prevent widespread problems.
Harvesting and Curing Your Bumper Crop
Knowing when to harvest is key to maximizing storage life and flavor. Your onions are typically ready when the tops begin to yellow, weaken, and fall over naturally, usually in late summer. This signals that the plant has finished sending energy to the leaves and is now dedicating it to the bulb.
- Stop Watering: About two weeks before harvest, stop watering to encourage the bulbs to dry out slightly, which aids in curing and storage.
- Loosen the Soil (Optional): If your soil is very compact, you can gently loosen the soil around the bulbs a few days before harvest to make pulling them easier.
- Harvest: On a dry, sunny day, gently pull the onions from the soil. If they're stubborn, use a digging fork to carefully lift them without bruising.
- Cure Your Onions: This is a crucial step for long-term storage. Lay your harvested onions in a single layer in a warm, dry, well-ventilated area (e.g., a shed, garage, or even outdoors on a porch if protected from rain) for 2-4 weeks. Allow the outer skins to dry and tighten, and the necks to shrivel. Do not wash them.
- Store: Once cured, trim off the dry tops (leaving an inch or two) and roots. Store your onions in a cool, dark, dry place with good air circulation, such as mesh bags, braided ropes, or slatted crates.
By following these steps, you'll be well on your way to a prolific onion harvest that will keep your pantry stocked for months. For more detailed comparisons on starting methods, explore Onion Sets vs. Seeds: Plant for Larger, Faster Onions.
Conclusion
Growing onions from sets is a wonderfully rewarding gardening endeavor, offering a straightforward path to abundant, flavorful bulbs. By carefully selecting your sets, preparing your soil with diligence, providing consistent care, and knowing the optimal time to harvest and cure, you'll master the art of onion cultivation. Embrace these tips, and prepare to enjoy the unparalleled satisfaction of cooking with your very own homegrown onions – a true testament to the simple joys of the garden.
